Deploying from VHD Image
This procedure describes how to install the OVOC server on a virtual machine in a Cloud-based deployment from the AudioCodes provided VHD image.
Before proceeding, ensure that the minimum platform requirements are met (see Hardware and Software Specifications).
| ➢ | Do the following: |
| 1. | Upload the VHD image provided by AudioCodes to your Azure Customer subscription Blob Storage account: |
| a. | Use Azure Storage Explorer or the Azure portal to upload your VHD file to a Blob storage account. |
| b. | Ensure the Blob type is set to Page Blob (see here). |
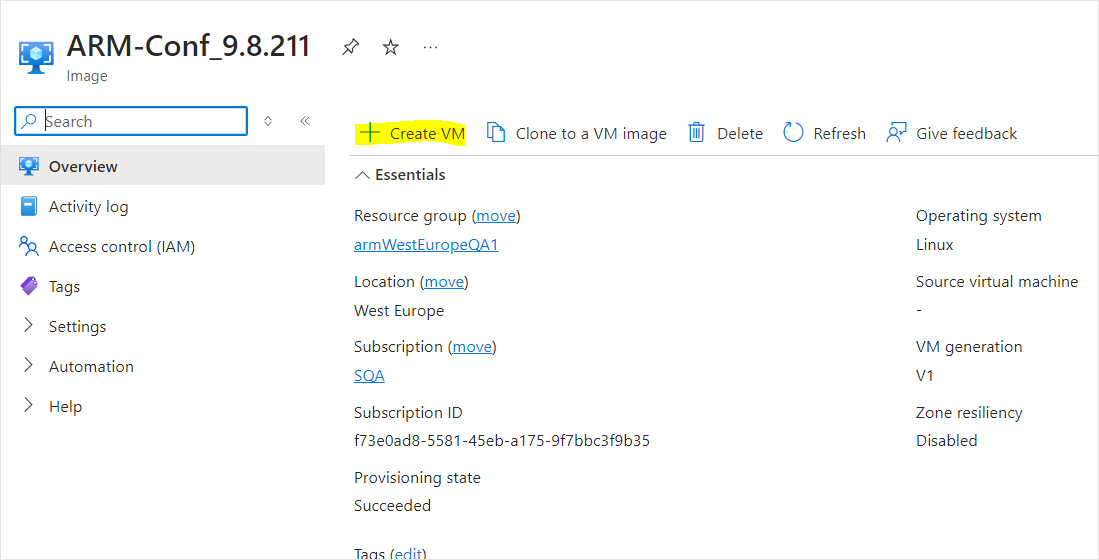
| 2. | Create a Virtual Machine from the Managed Disk: |
| a. | Go to the Virtual Machines section in the Azure portal. |
| b. | Click Create VM to create a new VM. |
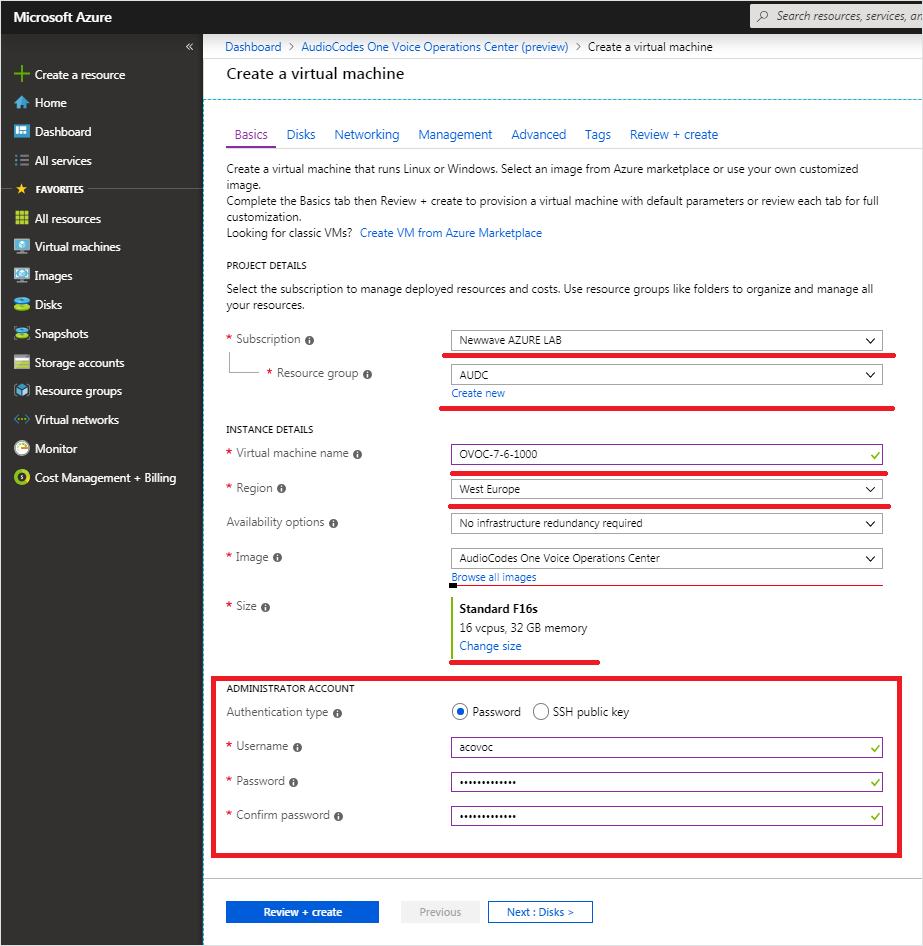
| 3. | Under the Basics tab: |
| a. | Choose your Subscription. |
| b. | Choose your Resource Group or create a new one |
| c. | Enter the name of the new Virtual Machine. |
| d. | Choose the Region. |
| e. | Browse to the Blob Storage account container where you uploaded the VHD file. |
| f. | Choose the VM Size (see Hardware and Software Requirements). |
| g. | Choose Authentication Type "Password" and enter username and user-defined password or SSH Public Key. |
Virtual Machine Details
| 4. | Click Next until Networking section to configure the network settings. |
Network Settings
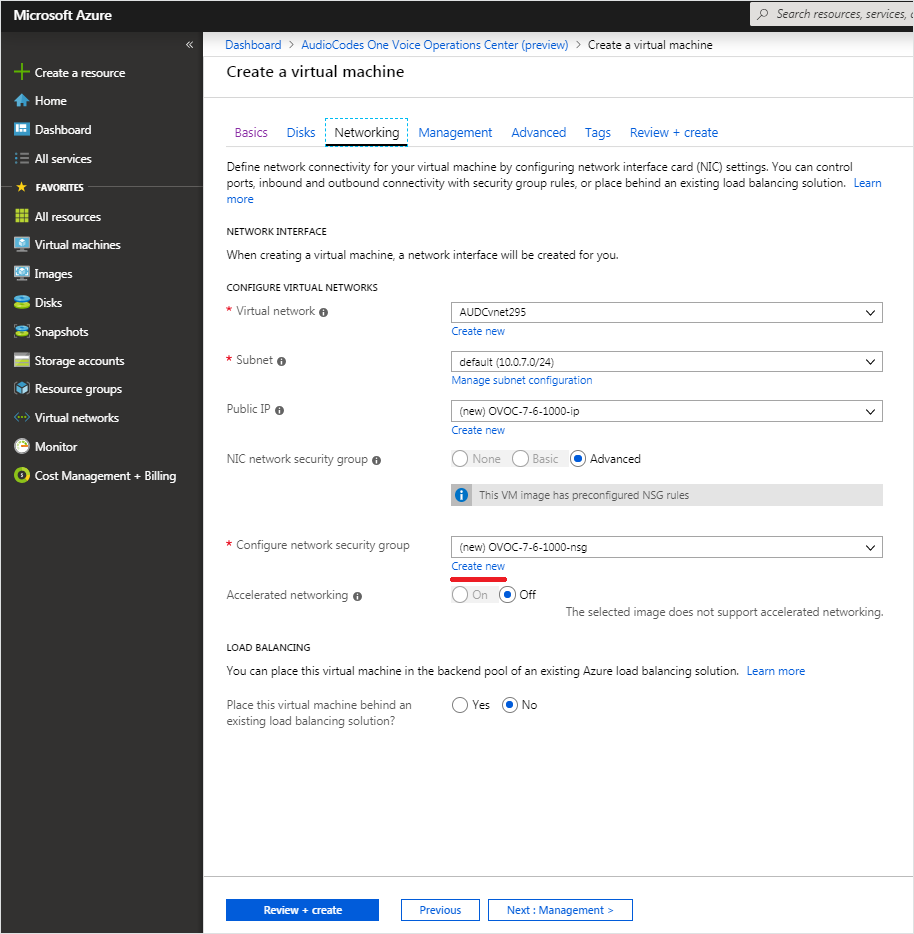
| a. | From the Virtual Network and Subnet drop-down lists, select an existing virtual network/subnet or click Create new to create a new virtual network/subnet. |
| b. | From the Public IP drop-down list, configure "none", use the existing Public IP or create a new Public IP. |
If you do not wish the public IP address to change whenever the VM is stopped/started, choose StaticSKU or BasicSKU+ Static.
| c. | Under Configure network security group, click Create new to configure a Network Security Group. Configure this group according to the Firewall rules shown in the table below. |
By default, only ports 22 and 443 are open for inbound traffic; open other ports for managing devices behind a NAT (outside the Azure environment) as described in the table below.
Microsoft Azure Firewall
|
Protocol |
Port |
Description |
|---|---|---|
| UDP | 162 | SNMP trap listening port on the OVOC server. |
| UDP | 1161 |
Keep-alive - SNMP trap listening port on the OVOC server used for NAT traversal. This rule is required if Auto-detection is used to add devices in OVOC. See Option 1: Connecting Mediant Cloud Edition (CE) SBC Devices to OVOC on Azure using Public IP Address |
| TCP | 5000 | Communication for control, media data reports and SIP call flow messages sent from Mediant Cloud Edition (CE) SBC. |
| TCP (TLS) | 5001 |
TLS secured communication for control, media data reports and SIP call flow messages sent from Mediant Cloud Edition (CE) SBC. This rule is used if the OVOC Server and managed devices (specifically Mediant CE devices) are deployed in separate Azure Virtual networks communicating behind a firewall. See Option 1: Connecting Mediant Cloud Edition (CE) SBC Devices to OVOC on Azure using Public IP Address |
| NTP | 123 | NTP server port (set the Microsoft Azure site IP address/Domain Name(where the OVOC server is installed) as the NTP server clock source. Referenced in procedures in Connecting Mediant Cloud Edition (CE) Devices on Azure |
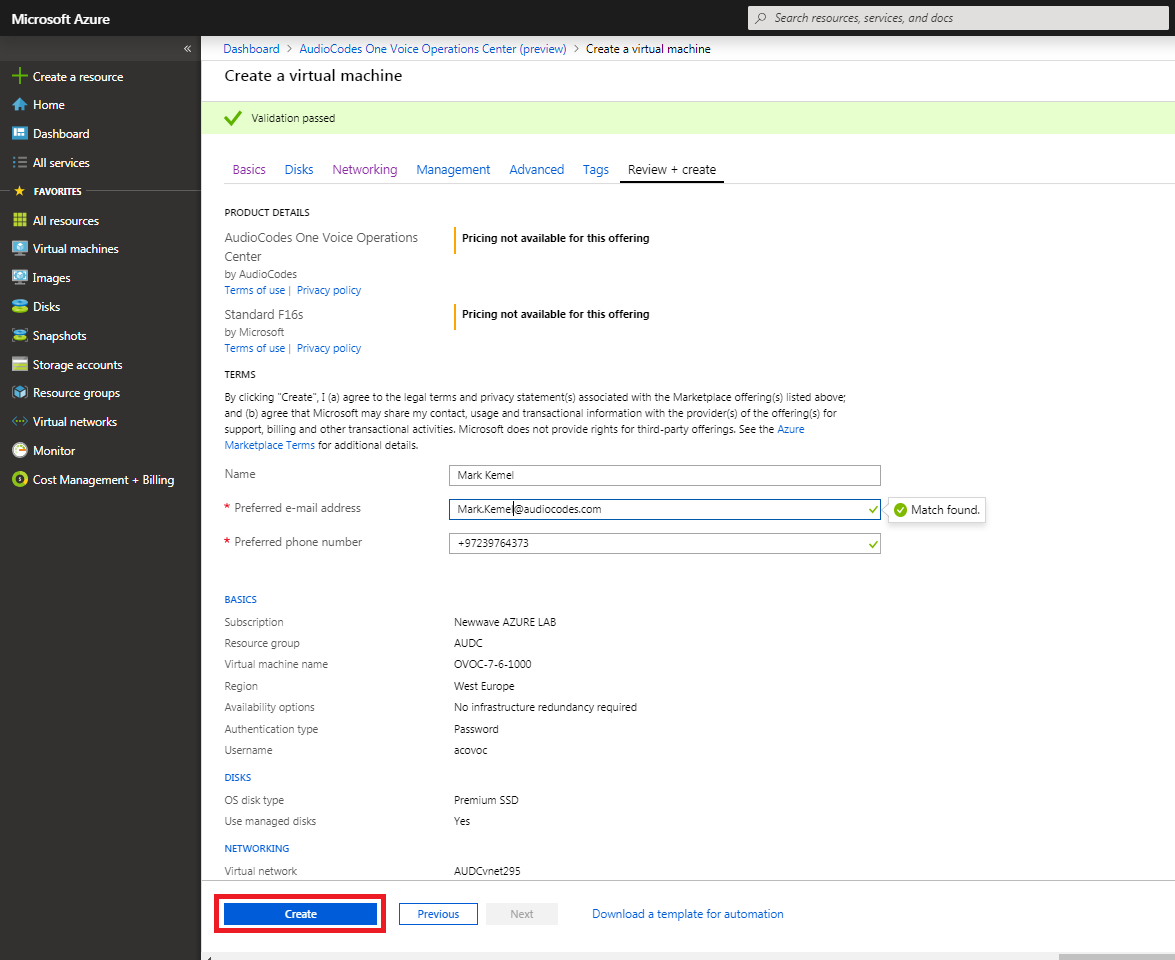
| 5. | Click Next until Review+Create tab, make sure all the settings are correct and click Create. |
Review and Create
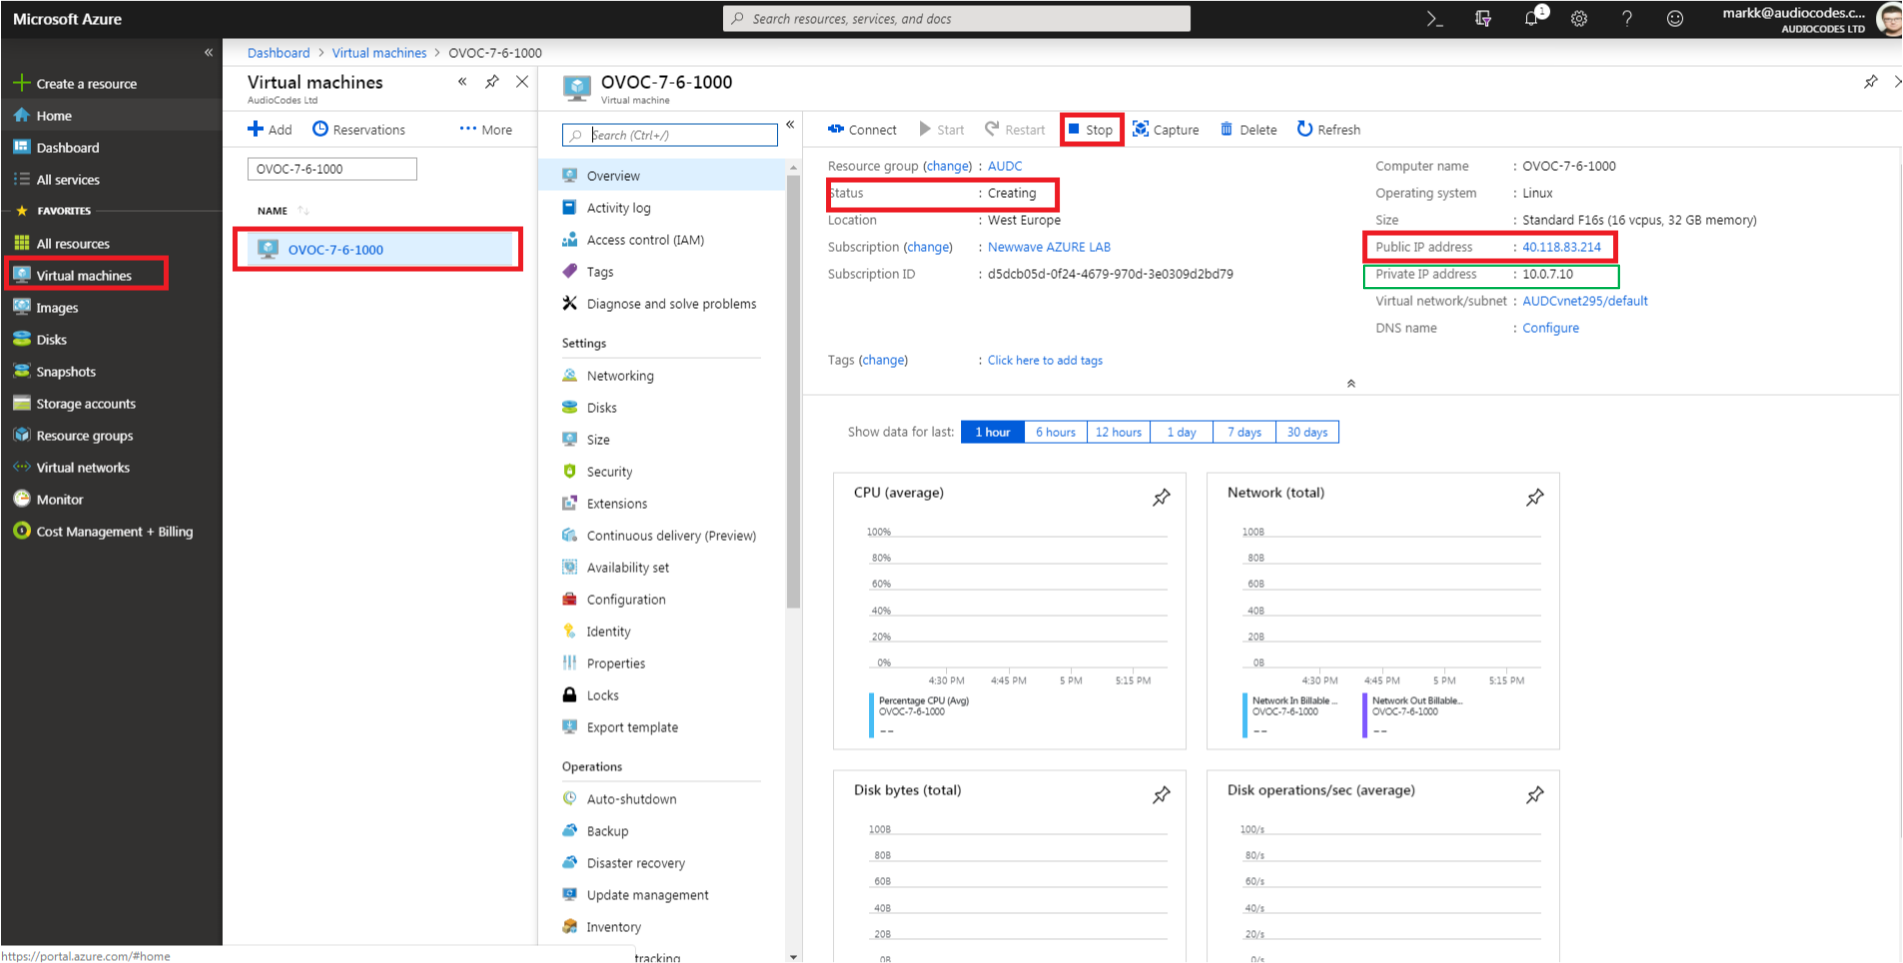
| 6. | Navigate to the "Virtual machines" section, where you can, for example, monitor the Virtual Machine creation process and find the Public or Private (Internal) IP addresses to access the Virtual Machine. |
The public or private (Internal) IP addresses as you need to configure them in Configuring the OVOC Server Manager on Azure (Public IP) and Configuring the OVOC Server Manager on Azure (Internal IP) respectively.
Azure Deployment Process Complete